Simplifying Mobile App Testing with Appium 2.0 and Device Farms

Setting up a mobile device farm for testing applications can be a daunting task, but recent advancements in tools like Appium 2.0 have made this process much more approachable and efficient. One such tool that stands out is the Appium Device Farm, known for its user-friendly interface and powerful capabilities. Let’s walk through the steps to set up and streamline your mobile testing using this incredible tool.
Prerequisite:
Before we get started, ensure you have Appium version 2.0.X installed on your system. This is the backbone of our setup, allowing us to manage and interact with the devices effectively.
Installing Appium Plugins
Let’s start by installing essential Appium plugins using the following commands:
appium plugin install — source=npm appium-device-farm
appium plugin install — source=npm appium-dashboard
Tracking iOS Device Events
For tracking iOS device events like device plugging and unplugging, we’ll use the ‘go-ios’ module. Install it using npm:
npm install -g go-ios
To ensure seamless integration, set the ‘GO_IOS’ environment variable. Open your .zshrc or equivalent file and add the following line:
export GO_IOS=”/usr/local/lib/node_modules/go-ios/dist/go-ios-darwin-amd64_darwin_amd64/ios”
Completing the Installation
With the plugins and necessary modules installed, we’re almost ready to start using the setup.
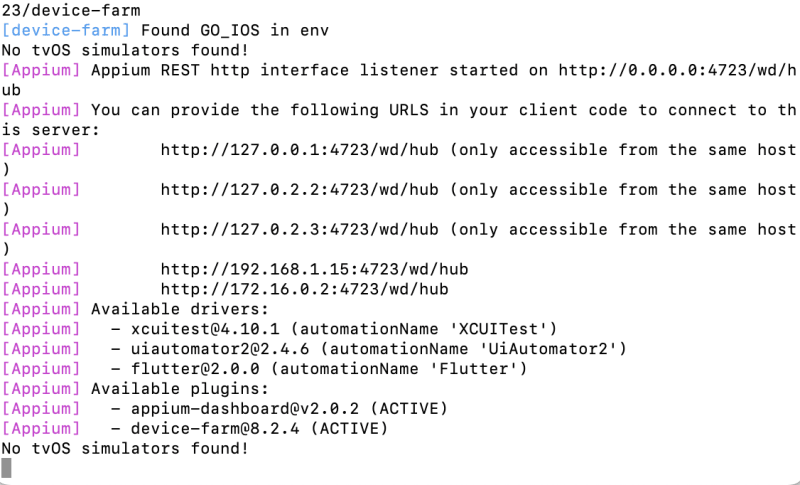
Starting the Appium Server
Connect your physical devices to the server or utilize simulators. Start the Appium server using the following command:
appium server -ka 800 — use-plugins=device-farm,appium-dashboard -pa /wd/hub — plugin-device-farm-platform=both
This command kickstarts the server and sets it up to use the plugins for managing the device farm effectively.
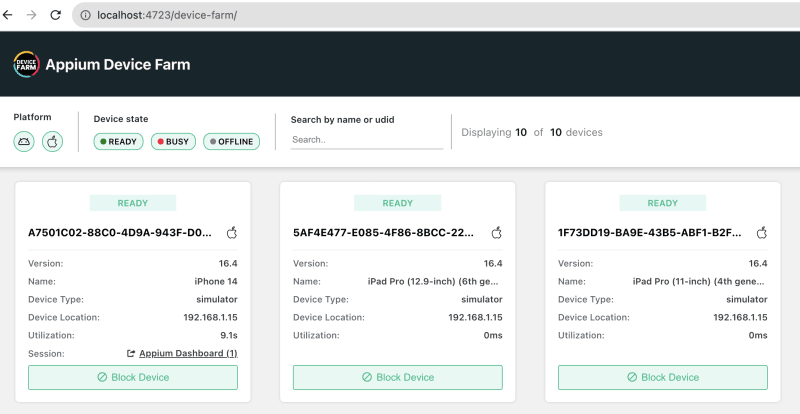
Accessing the Dashboard
Voilà! You’re now all set. Access the dashboard to monitor device availability at http://localhost:4723/device-farm/
Running a Basic Demo Test
Let’s run a simple demo test to ensure everything is working smoothly. Below is a basic demo test using Appium to interact with an iOS application on an iPhone 14 simulator.
import io.appium.java_client.AppiumBy;
import io.appium.java_client.ios.IOSDriver;
import io.appium.java_client.ios.options.XCUITestOptions;
import org.openqa.selenium.support.ui.ExpectedConditions;
import org.openqa.selenium.support.ui.WebDriverWait;
import org.testng.annotations.AfterMethod;
import org.testng.annotations.BeforeMethod;
import org.testng.annotations.Test;

import java.net.MalformedURLException;
import java.net.URL;
import java.time.Duration;

public class IOSBasicDemo {

    protected static IOSDriver driver = null;
    public WebDriverWait wait;

    @BeforeMethod
    public void setup() throws MalformedURLException {

        XCUITestOptions options = new XCUITestOptions();
        options.setDeviceName("iPhone 14");
        options.setPlatformVersion("16.4");

        String appPath = System.getProperty("os.name").equals("Windows 10") ? "\\apps\\TheApp.app" : "/apps/TheApp.app";
        options.setApp(System.getProperty("user.dir") + String.format(appPath, ""));

        driver = new IOSDriver(new URL("http://127.0.0.1:4723/wd/hub"), options);
        wait = new WebDriverWait(driver, Duration.ofSeconds(10));
    }

    @Test()
    public void TestScenario() throws InterruptedException {
        wait.until(ExpectedConditions.visibilityOfElementLocated(new AppiumBy.ByAccessibilityId("Photo Demo"))).click();
        Thread.sleep(3000);
    }

    @AfterMethod
    public void teardown() {
        driver.quit();
    }
}
Exploring the Appium Device Farm Dashboard
The Appium Device Farm dashboard offers a comprehensive view of your testing environment. From execution video capture to device logs and debug logs for troubleshooting, it provides crucial insights to enhance your testing experience.

A huge shoutout to the contributors at the Appium Device Farm GitHub repository for their dedication and efforts, in making mobile testing more accessible and efficient!
Happy testing with Appium Device Farm! 🚀

Comments
Post a Comment